Post Content
Post Content
How to Shave a Beard
“To beard, or not to beard. That is the question.”
Having a beard was fun while it lasted, but for one reason or another you’ve decided you want to shave it off.
So what’s the next step?
As anyone who’s ever tried to shave their face with a razor after even only a few days of neglect, fully knows the longer your facial hair is the more time and effort that needs to go into the shaving process.
This is especially true if you’ve been rocking the bearded look for quite some time now, as your face is wholly unprepared for the stress that shaving is about to put it through.
Since you might have already know how to groom a beard and maintain a clean beard, it is time for you to also know how to shape a beard (or shave a beard) and how to trim a mustache.
So it’s important that you take some time to properly prepare and arm yourself for the battle ahead in order to save yourself a lot of pain and problems down the road.
Whether you’ve decided to take the giant leap and go fully clean-shaven, or simply want to change things up and turn your full beard into something more professional like a circle beard or goatee, or something a bit wilder like a handlebar mustache or mutton chops—following these tips will help you get a close, smooth shave and hopefully prevent irritation, blemishes and razor burn.
It is however ideal that you at least know how to trim a beard and trimming a beard properly requires the right beard maintenance tools.
Let’s now have a look at some of the beard trimming tools you must have at your disposal before beard styling begins.
Most Popular Products |
||
|---|---|---|
| "Best Beard Straightener" | "Best Beard Kit" | "Best Beard Oil" |
 |  |  |
| Buy on Amazon | Buy on Amazon | Buy on Amazon |
Gathering the Proper Tools
Before you attempt to shave off your beard, it’s important that you invest in the proper tools for the job.
This includes a trimmer (probably need some beard trimming tips) or clippers (reviews of the best beard trimmers), a razor, several towels, and shaving cream.
If you really want to go the full mile, you should also get yourself a shaving brush like the ones a beard barber would use.
Combined with a high-quality shaving cream, a shaving brush (shaving brush guide) will help get you a much richer, thicker lather (which will help better lubricate your face), while also helping to exfoliate the skin—removing dirt and dead skin cells to prevent blemishes and irritation.
A high-quality astringent and antiseptic face wash is also a good idea to have on hand, as it a moisturizing aftershave lotion.
Check out our article on the best aftershave balms for guidance on which one to pick up.
When buying a face wash, it’s best to find one with natural astringents and antiseptics like witch hazel and tea tree oil if possible.
I recommend Trillium’s Facial Cleanser that has both witch hazel and tea tree oil.
- Shaving Cream
To keep that professional beard look and maintain your preferred short beard styles, you must apply shaving cream to the areas (like the beard neckline) you want to remove.
As far as the shaving cream goes, it’s a good idea to spend the extra money on a high-quality product—preferably one that’s all-natural if you can find it.
Investing in a good shaving cream can mean the difference between a soft, smooth face and an ugly, red razor-burned mug that keeps you home for days.
Generally, the better quality shaving cream is, the less it will foam.
Cheap shaving creams use this foaming action in an attempt to lubricate, whereas the higher quality creams create a thicker lather using silicon to help the razor blade smoothly glide over the skin.
Check our articles on the best shaving creams for men as well as the top shaving creams for sensitive skin.
- Razors
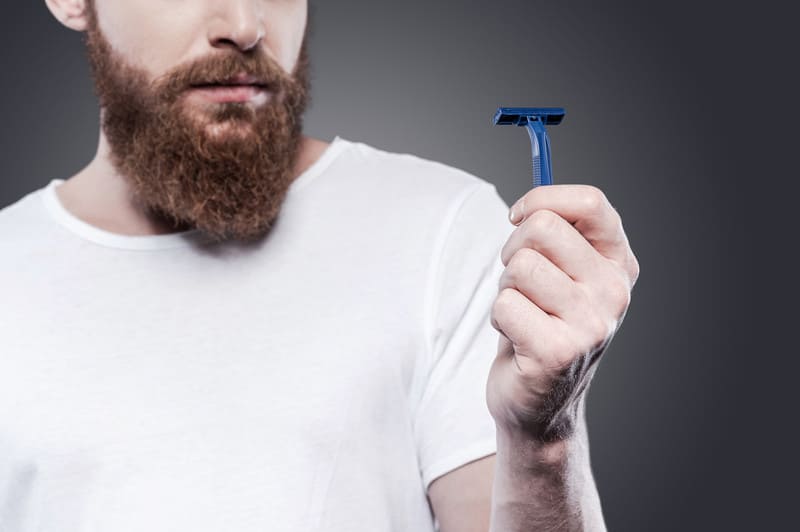
On the topic of razors, straight razors are always the best for shaving off a beard, but if you don’t know how to use one, at least get yourself a high-quality multiple-blade safety razor.
Don’t waste your money on the cheap disposable ones, but instead go for something with replaceable blades designed for multiple uses.
I do recommend however that you learn some beard grooming tips as this will come in very handy when you need to style that corporate beard or cleanly shave that neckbeard without any casualties (beard cuts).
We have a great article on the top safety razors in case you are in the market for a razor.
If you’re willing to spend the extra cash, many people have had great luck with the newer so-called “power” razors (like the Gillette Fusion ProGlide).
Not to be confused with an electric razor, these instead look like your standard multiple-blade safety razors, but with an added vibrating function that provides a closer, more even shave.
No matter what type of razor you’re using, make sure to start off with a new, sharp blade, and if you’re using a safety razor, it’s a good idea to have a few replacement blades on hand—especially, if you have extra coarse or thick facial hair.
How to Shave a Beard- A Step by Step Guide
- Step 1- Preparing Your Face and Beard
Now that you’ve got the proper tools in hand, it’s time for the fun (or maybe not so fun) part, but before you actually start shaving, it’s important you prep your hair.
If you have the time, jump in a hot shower and let the water run over your head and through your beard for a few minutes, as this will help soften it up.
It’s also a good idea to wash your face and beard, and even a bit of conditioner won’t hurt, as the softer the hair is, the easier it is to cut.
If you don’t have time to shower before you shave, at least make sure to wash your face, and then preferably wrap it in a warm, wet towel for a few minutes.
This will help soften the hair and open up your pores, preventing dirt from getting trapped within and causing acne or razor burn.
- Step 2- Trimming Away the Excess Hair
With your face and hair warm and wet, it’s now time to break out the clippers and set to trimming away as much of your beard as possible.
If you’re not getting rid of everything (maybe just removing the chin beard), try to trim as much as you can until you get something close to your desired final result.
Still, you don’t have to worry about being too meticulous here, as you’ll be doing the final sculpting later.
In fact, it’s better to leave a bit extra to give yourself a bit of room to play with, so be careful not to remove too much to start with or you may ruin the look you were going for.
Depending on the length of your beard (this is how to trim a long beard) – it’s usually a good idea to start off using a longer beard guard and then gradually go shorter, before finally removing it altogether and trimming it right up to the face.
If you have a shorter beard, you may be able to do it all without a guard, but be careful—trying to take too much hair at once can result in having a large chunk of hair torn out of your face instead of clipped.

- Step 3- Rinse, Lather, Repeat
After trimming your hair to a length that is a bit easier to deal with, make sure to completely wash off all the hair from your face—again using warm water to soften up the remaining hair.
Once your face is washed, it’s always a good idea to use a pre-shave lotion or oil if you’ve got one.
Then grab your shaving cream, add a bit of water to it and work it into a nice lather.
Once it’s ready, apply it to your face using upward circular motions to pull the hair out and away from your face—making sure you’ve got everything covered in a nice, thick layer.

- Step 4- Shaving Done Right
Many men are convinced that they know the “right way” to shave, and most of us were probably told by our dads exactly what that “right way” was, which usually said always shave with the grain.
This is partly true, but every man’s face is different, so the right way for you might also be slightly different.
Still, generally speaking it’s best to go with the grain when shaving the cheeks and upper lip, using short, even downward strokes.
When doing the jawline, start at the middle of the chin, then shave up and out towards your ear.
How to shave neck
However, the neck and chin area is when it gets a bit more tricky, and when dad’s old trick about going with the grain doesn’t always hold true.
While it’s best to start by going with the grain on these areas, you’ll probably need to flip the razor over and go the other direction to get anything that comes near to resembling a close shave.
In fact, depending on your face, you may just skip going with the grain here altogether.
The only problem with shaving against the grain is that it is the main culprit behind razor burns and skin irritation, not to mention a good way to cut yourself.
So make sure to take your time, be careful, and always have a wet razor and plenty of shaving cream whenever going against the grain.
Start out by shaving your cheeks before moving on to the mustache and then the neck, saving the chin and jawline for last.
These hairs are usually the coarsest, so it’s a good idea to give the shaving cream a bit more time to soften them up.
Make sure to shave in short, even strokes and clean off the razor after every few passes.
This will help keep the blade sharp and also wet so that it easily slides over your face.
If you want a super close shave, you can rinse your face off and then reapply the shaving cream and go over it all once again.
Finally, once you’re satisfied with the shave, it’s time to help repair all that damage you just did to your skin.

- Step 5: Time to Heal
When you have successfully and cautiously followed the beard trimming guide in step 4 above and put all your beard ideas to action, keeping your face clean is next.
Now that you’ve finally made it through what was surely a trying ordeal, it’s time to treat and protect your freshly shaved skin while it’s at its most fragile state.
It’s important that you take care of your skin well as soon as you’ve finished shaving, as this will help prevent razor burn and ingrown hairs.
After thoroughly rinsing all of the hair and shaving cream off of your face, give it a deep clean with the face wash.
Next, take a soft, clean towel and gently pat your face dry, before finally rubbing in your aftershave and then taking a step back to admire the brand new, clean-shaven you.
For aftershave recommendations check out this article on the best aftershaves.
Also, don’t forget to check out our infographic on straight razors vs safety razors.


